Start from a tournament that already has pools
Pool play works best after the tournament basics are already created: sport, date, fields or courts, divisions, team capacity, and schedule windows. If you still need to build the event, start with How to Create a Tournament in BracketIQ. If teams are not registered yet, use How to Set Up Tournament Registration for Teams and Players. If you need the broader day-of workflow, keep How to Manage a Tournament in BracketIQ open as the companion guide.
This example uses an indoor soccer tournament with eight teams, two pools, and four teams advancing to a playoff bracket. The same workflow applies to volleyball, pickleball, basketball, outdoor soccer, tennis, hockey, baseball, football, and other recreational sports when you want teams to play several pool matches before bracket play starts.
Before tournament day, decide:
- How many pools you need.
- How many teams should be in each pool.
- How many teams advance from pools into the bracket.
- Whether advancement is based on final points, record, tiebreakers, or manual adjustments.
- Which fields or courts can support pool matches and bracket matches.
BracketIQ keeps those pieces connected so the pool schedule, standings, and bracket advancement are managed from the same tournament workspace.
Check the pool-play configuration
Open the tournament and go to the Details tab. In the Divisions section, review the tournament configuration and the saved division card before you start entering or confirming results.
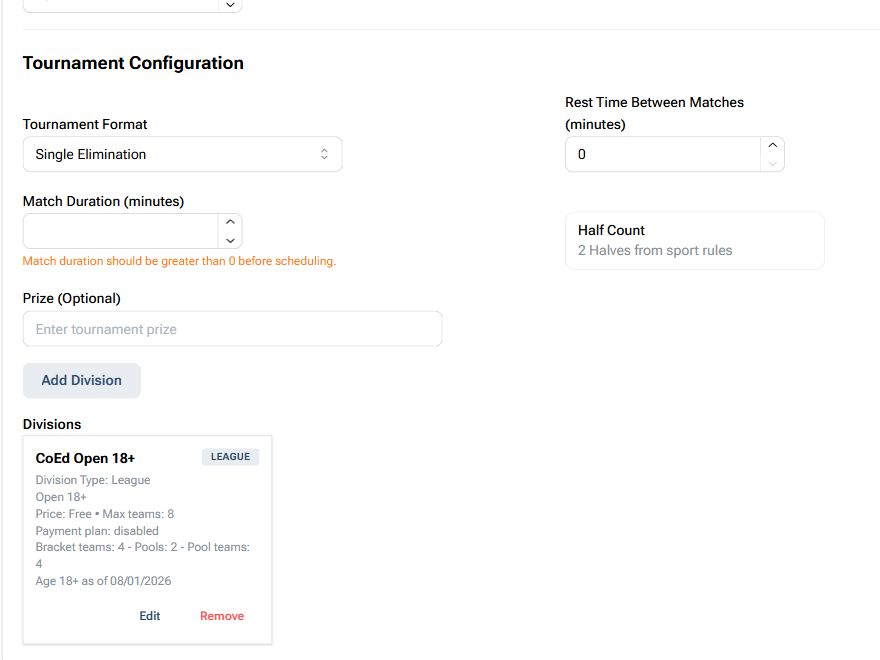
For this example, the division summary shows:
- Max teams:
8 - Bracket teams:
4 - Pools:
2 - Pool teams:
4
That means the event can run two four-team pools, then advance four teams into the playoff bracket. For most local tournaments, this is the cleanest format because every team gets multiple pool games before elimination rounds begin.
Check this section before teams arrive. If the number of teams, pools, or advancing teams is wrong, fix it before you rely on standings or bracket placements.
Review the schedule in Agenda view
Open the Schedule tab and switch to Agenda view. Agenda view is the clearest way to review pool games and bracket games in time order while still seeing the assigned fields or courts.
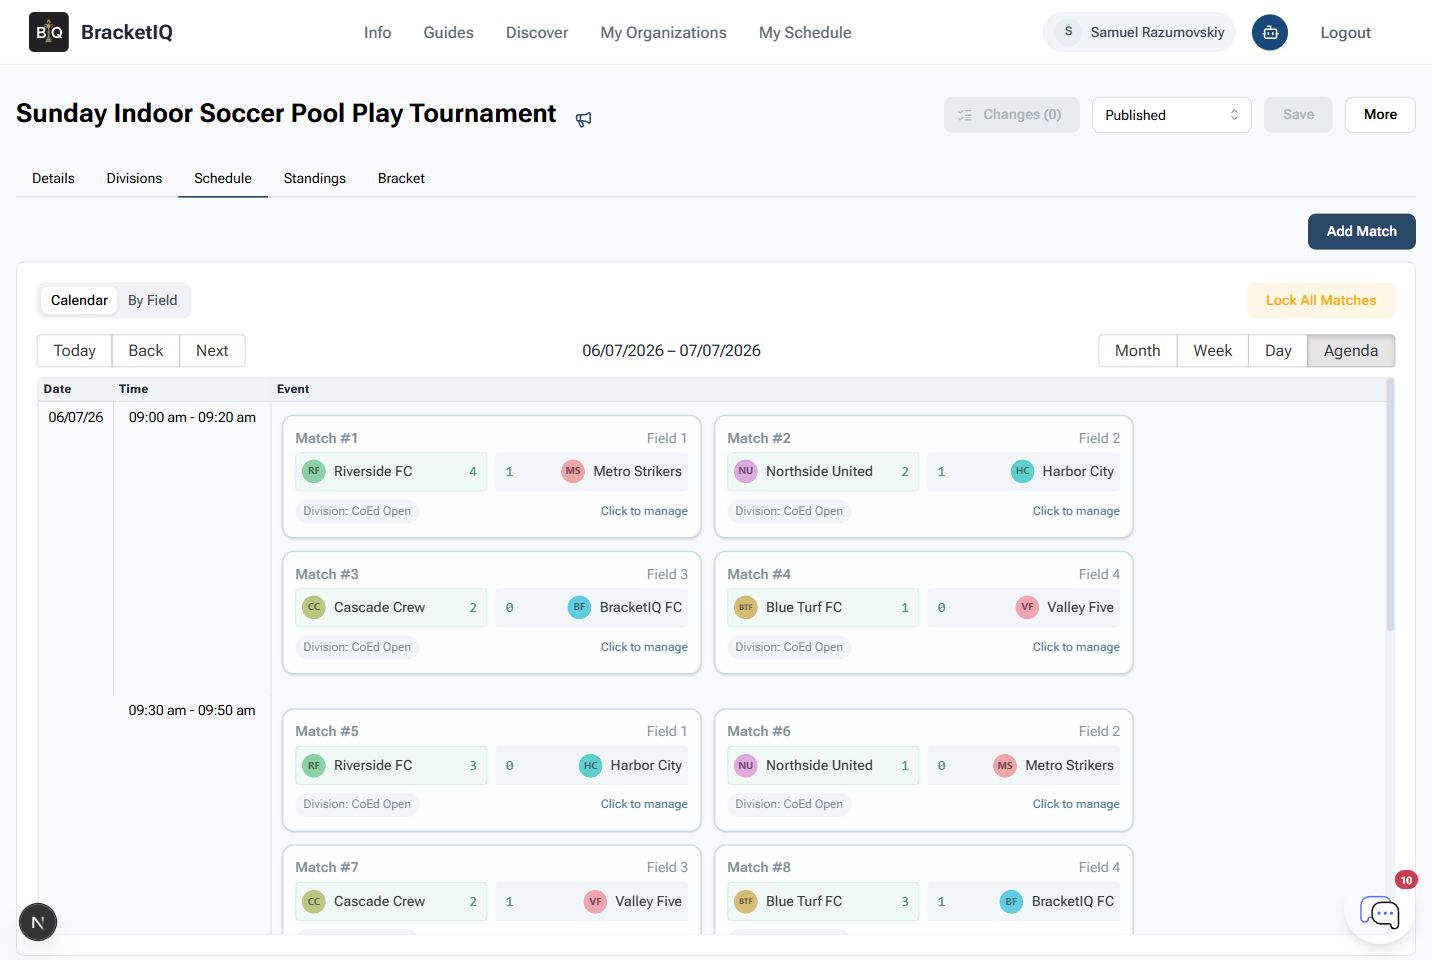
Review the schedule in the order staff will use it:
- Confirm the visible hours cover the full event window.
- Check the first wave of pool matches.
- Look for teams playing back-to-back without the rest time you intended.
- Confirm each field or court is being used correctly.
- Leave bracket matches with winner placeholders until pool results are confirmed.
The schedule should answer where each team goes next without a separate spreadsheet. If you need to change match times or fields, make those edits before you confirm pool standings.
Enter scores and review pool standings
As pool matches finish, enter scores from the schedule or match editor. Then open the Standings tab, choose the division, and select the pool you want to review.
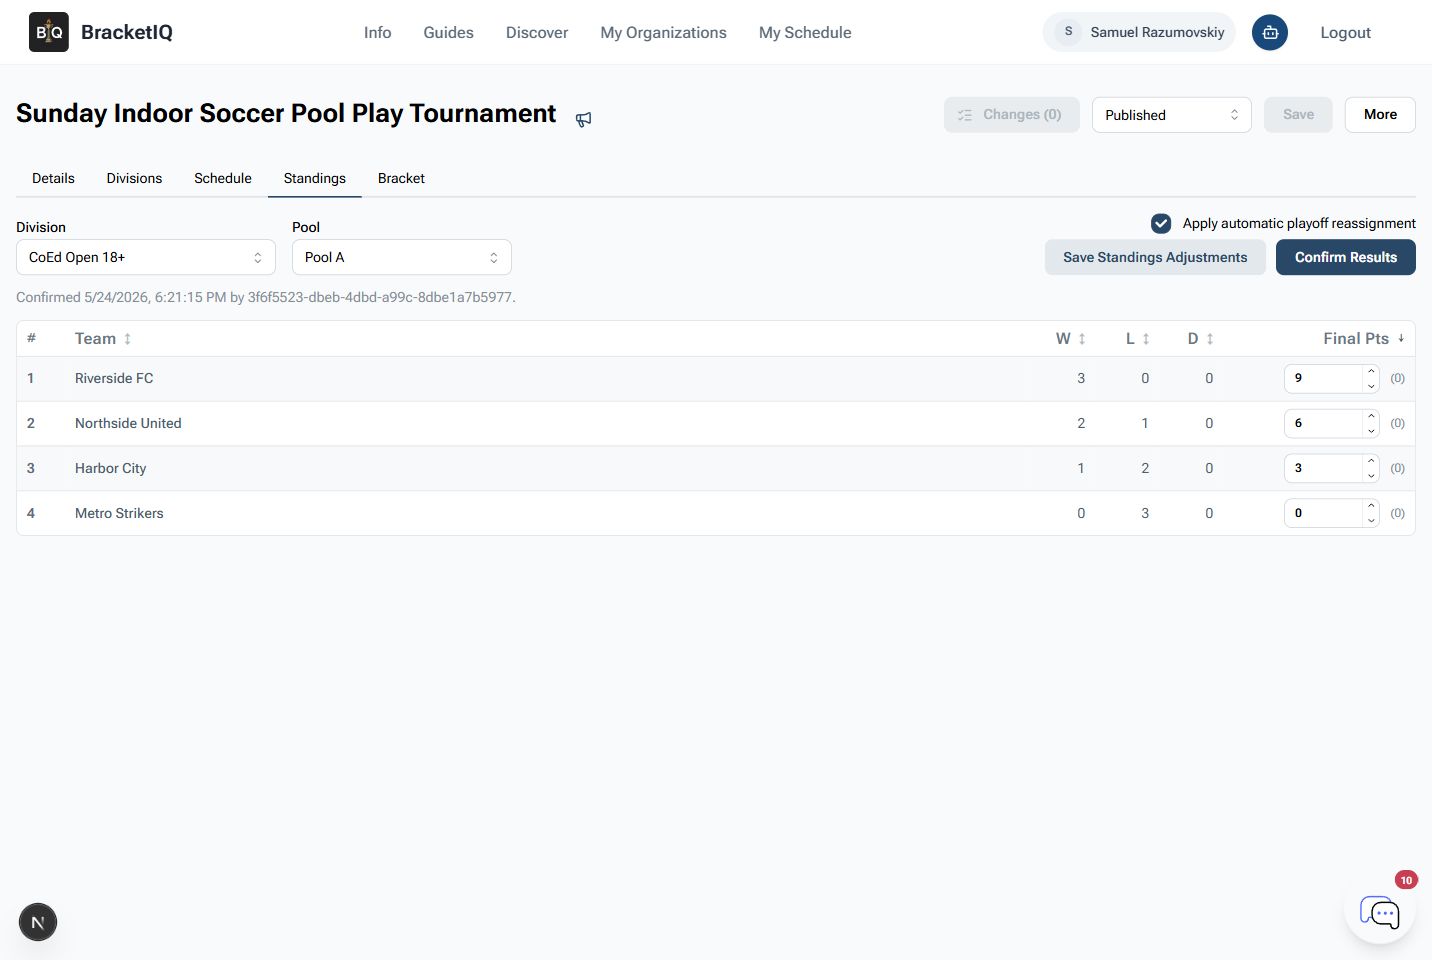
Use the standings screen to check:
- Teams are ranked in the expected order.
- Wins, losses, draws, and final points match the reported results.
- The selected pool is the one you are confirming.
- Manual standings adjustments are only used when you intentionally need to handle a tiebreaker or organizer decision.
Do not rush this step. Once pool results feed the bracket, teams will expect the bracket matchups to match the published standings.
Confirm results and seed the bracket
When a pool is ready, leave Apply automatic playoff reassignment turned on and click Confirm Results. BracketIQ uses the confirmed standings to place advancing teams into the bracket.
Repeat the same check for each pool. In an eight-team, two-pool event with four advancing teams, you should confirm both pools before relying on the semifinal matchups.
After confirming the pools, open the Bracket tab and review the seeded bracket.
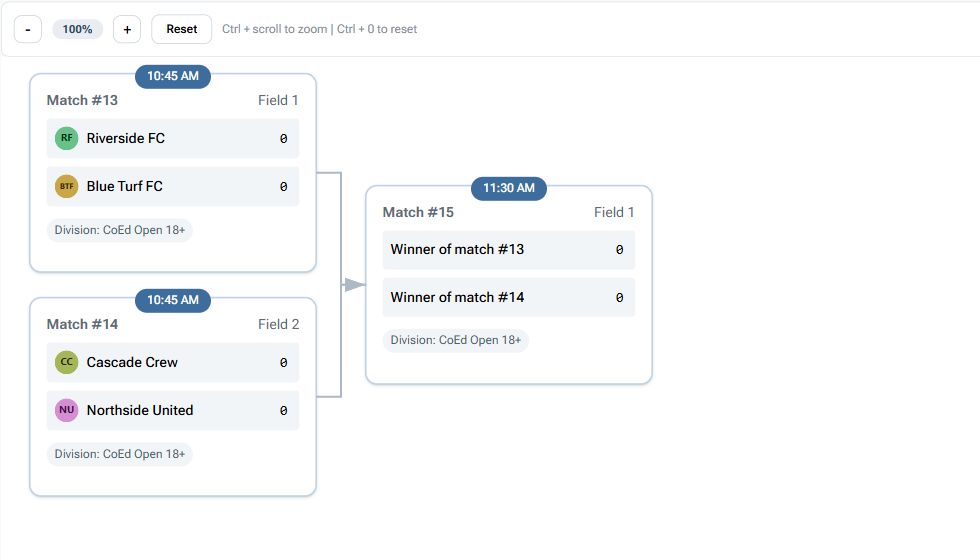
In this example:
Riverside FCandBlue Turf FCare placed into one semifinal.Cascade CrewandNorthside Unitedare placed into the other semifinal.- The final still shows winner placeholders until semifinal results are entered.
This is the point where pool play becomes bracket play. If a matchup does not look right, go back to the pool standings before scores are entered in the bracket.
Run the bracket after pools are confirmed
Once the bracket is seeded, manage it like any other tournament bracket:
- Open each bracket match from the Schedule or Bracket tab.
- Confirm the teams, field, and scheduled time.
- Enter scores as matches finish.
- Save updates after each score change.
- Watch winner placeholders advance into later matches.
- Keep the public event page accurate for teams checking from their phones.
If staff or scorekeepers are helping, show them where the bracket matches live before pool play ends. The transition from pools to bracket is usually when questions increase, so the tournament director should not be the only person who knows where the next match is.
Pool-play tournament checklist
Use this checklist before and during the event:
- Create and publish the tournament first.
- Confirm the division has the right team capacity.
- Check the pool count and teams per pool.
- Confirm how many teams advance into the bracket.
- Review the schedule in Agenda view by time and field.
- Enter pool match scores as they finish.
- Review each pool's standings before confirming results.
- Keep automatic playoff reassignment on when you want BracketIQ to seed the bracket.
- Confirm every pool that feeds the bracket.
- Open the Bracket tab and verify the first bracket matchups.
- Continue score entry from the bracket once pool play is complete.
Pool play is where BracketIQ is most useful for tournament directors: the schedule, standings, advancement, and bracket are connected. Instead of copying results from one tool into another, you can review the pools, confirm the standings, and move directly into the playoff bracket from the same event workspace. For a deeper score-entry and advancement workflow, continue with How to Manage Tournament Results, Standings, and Advancement.
