Start with the season you want teams to understand
This guide uses a weekly indoor soccer league as the example, but the same setup pattern works for volleyball, outdoor soccer, pickleball, basketball, tennis, hockey, baseball, football, and other recreational sports.
Before you start the form, decide the basics:
- The sport, league name, and description teams will recognize.
- How captains should register teams, and whether players without a team should have a free-agent path later.
- The season start date and expected end date.
- The fields, courts, rinks, or surfaces available each week.
- The divisions and eligibility rules.
- How standings should award points.
- Whether the league is free or paid.
BracketIQ turns those decisions into a league workspace with a public event page, registration settings, division capacity, weekly scheduling inputs, standings rules, and organizer controls.
Create a new league draft
After signing in, start a new event and open the Details tab. BracketIQ keeps the event in draft mode while you set up the league.
Use the draft while you are still confirming season details, divisions, fields, and registration settings. Publish only after the public page is ready for teams.
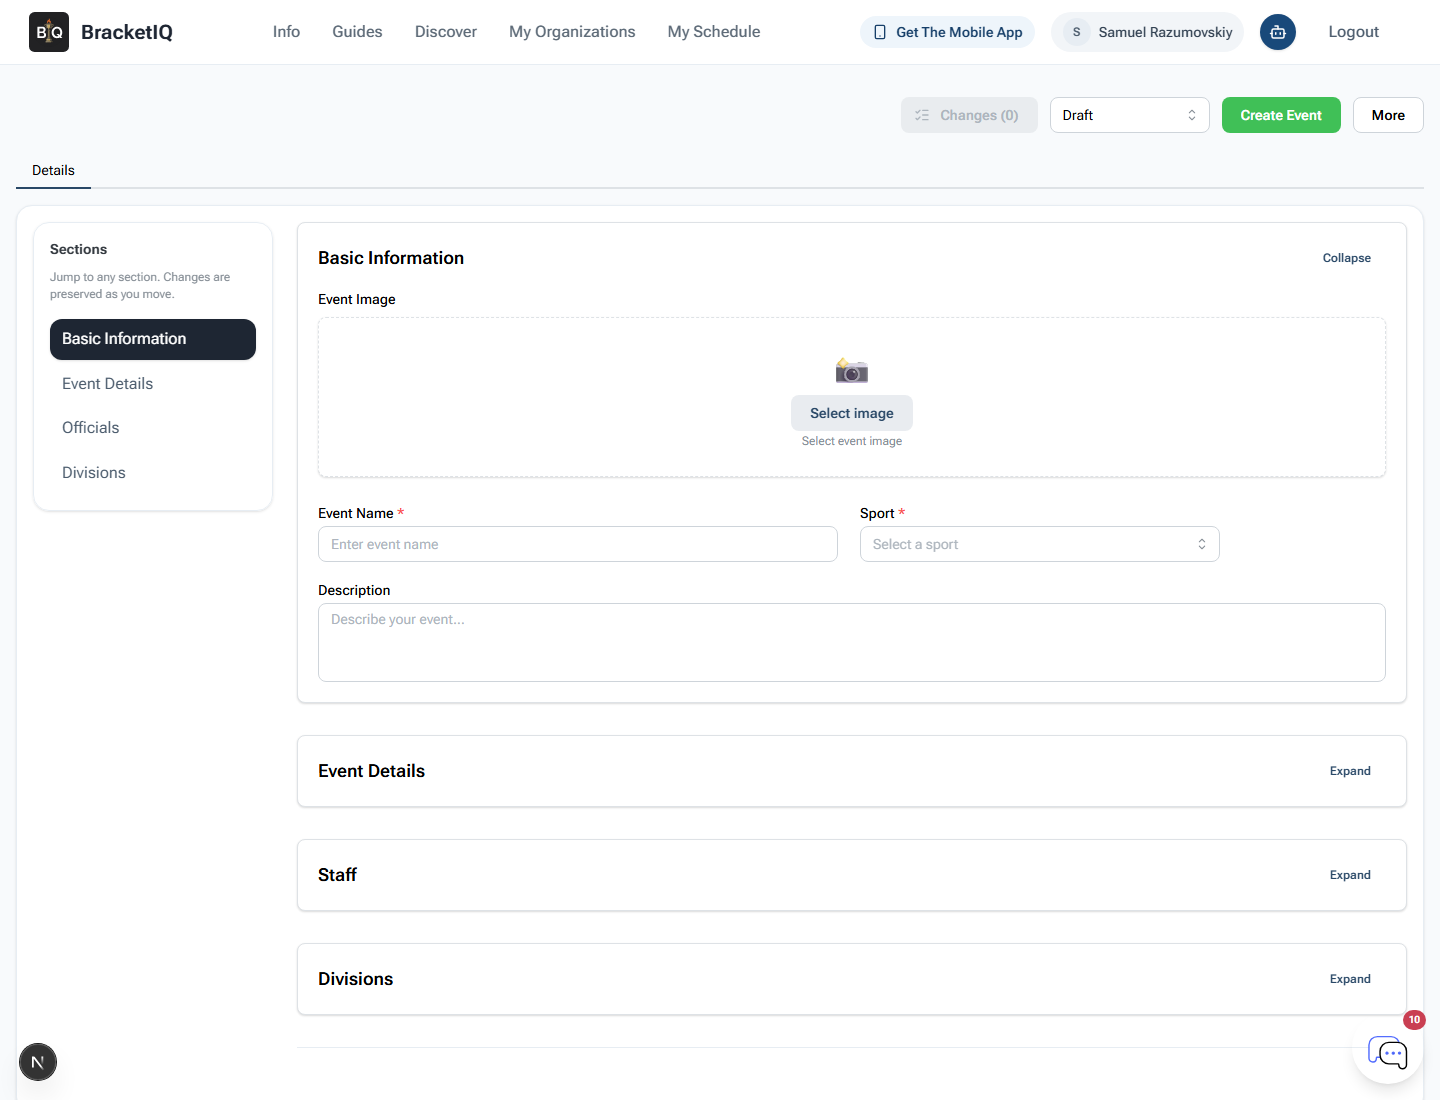
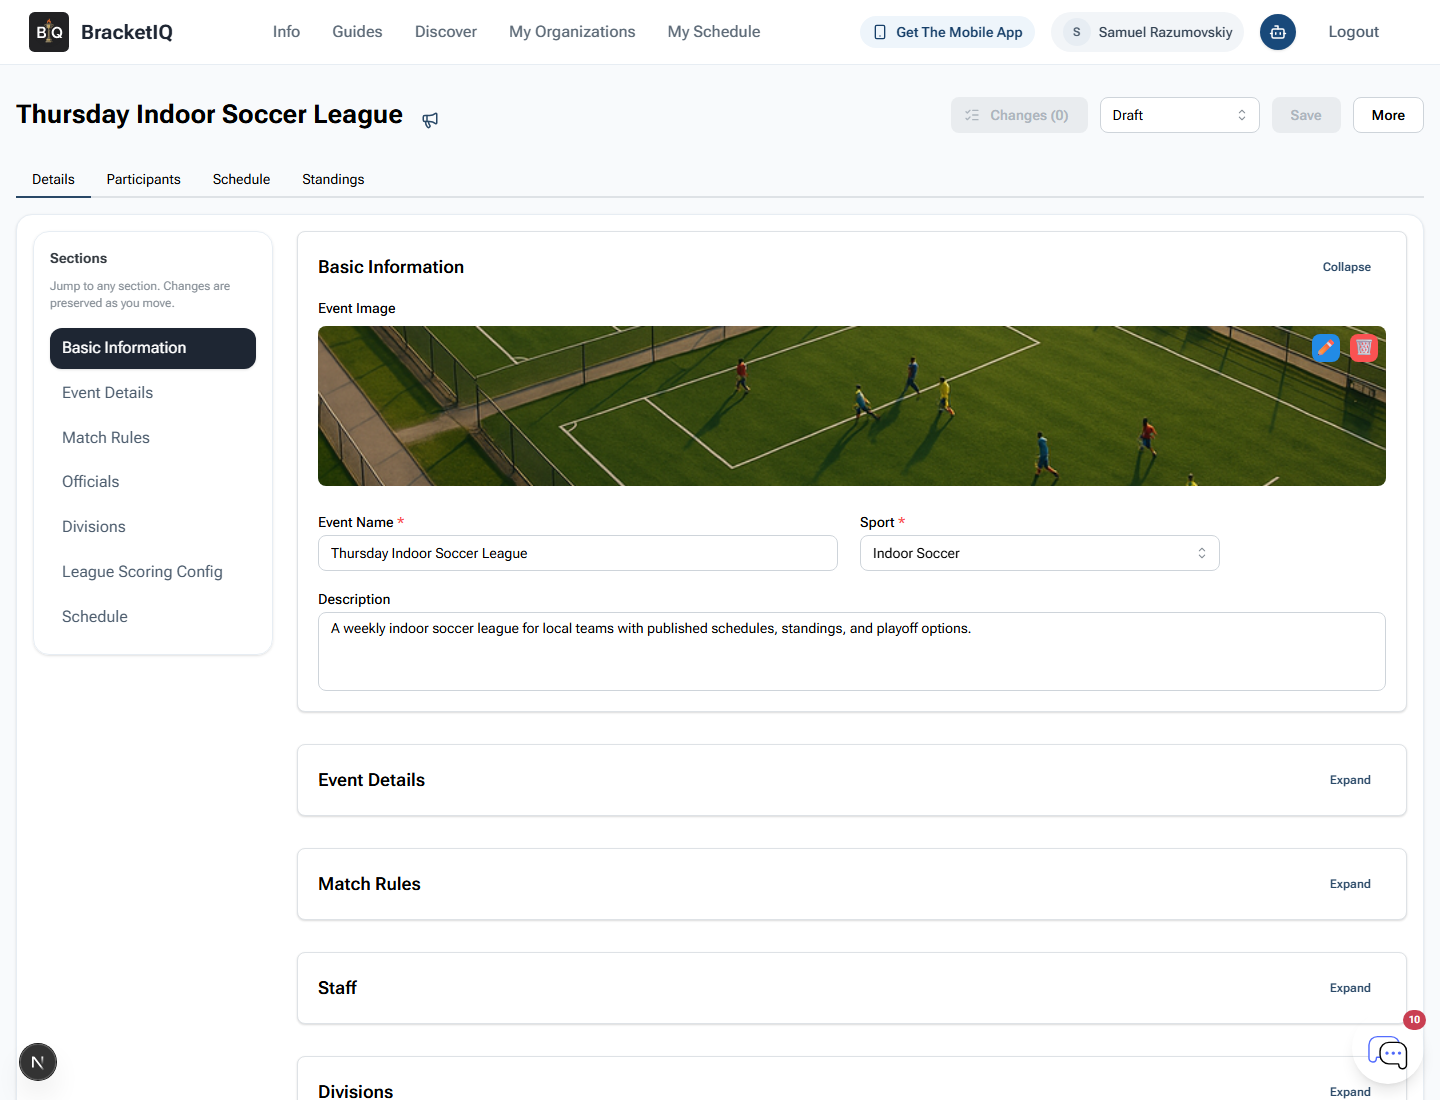
Add the basic information
Open Basic Information first. Add a clear league image, choose the sport, enter the league name, and write a short description.

For this example:
- Event name:
Thursday Indoor Soccer League - Sport:
Indoor Soccer - Description: a short note that tells teams this is a weekly league with schedules, standings, and playoff options.
The name should make sense in a public event list. Include the sport, night, season, or audience when that helps teams decide quickly.
Set the league details
Open Event Details and change Event Type to League. BracketIQ switches the form to league setup, including team registration, season timing, fields, division settings, weekly schedule windows, and standings configuration.

For the example league, use:
- Event type:
League - Team size:
5 - Registration cutoff:
24hours before the start. - Location: the venue or city teams should use.
- Number of fields:
2 - Field names:
North FieldandSouth Field
Name fields and courts the same way staff and players will talk about them on site. Published schedules are easier to follow when the surface names match the facility.
Add the division and league settings
Open Divisions next. A league still needs at least one division because BracketIQ uses it for capacity, price, eligibility, registration, schedule assignment, and standings.
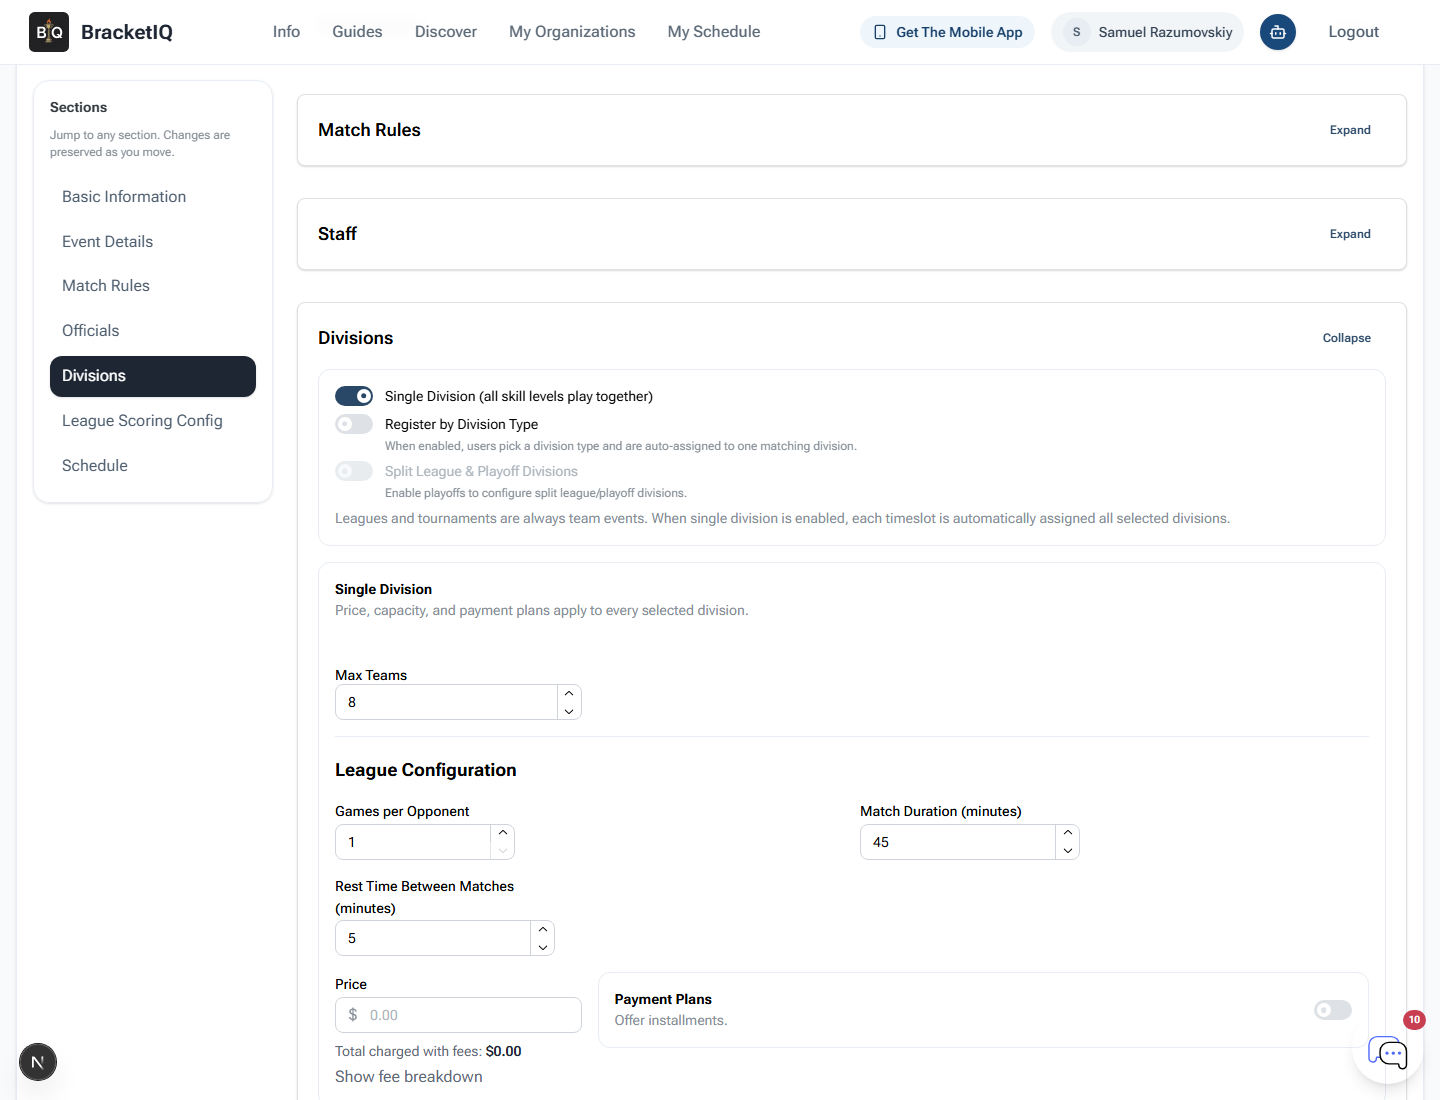
For this single-division league:
- Keep single division enabled.
- Set max teams to
8. - Set games per opponent to
1. - Set match duration to
45minutes. - Add
5minutes of rest time between matches. - Leave price at free, or enter a team price before publishing.
- Add the division as
CoEd Open 18+.
If you are charging teams, confirm the price before you add or publish the division so registration and checkout are clear.
Configure league scoring
Open League Scoring Config and set the standings points BracketIQ should apply automatically.
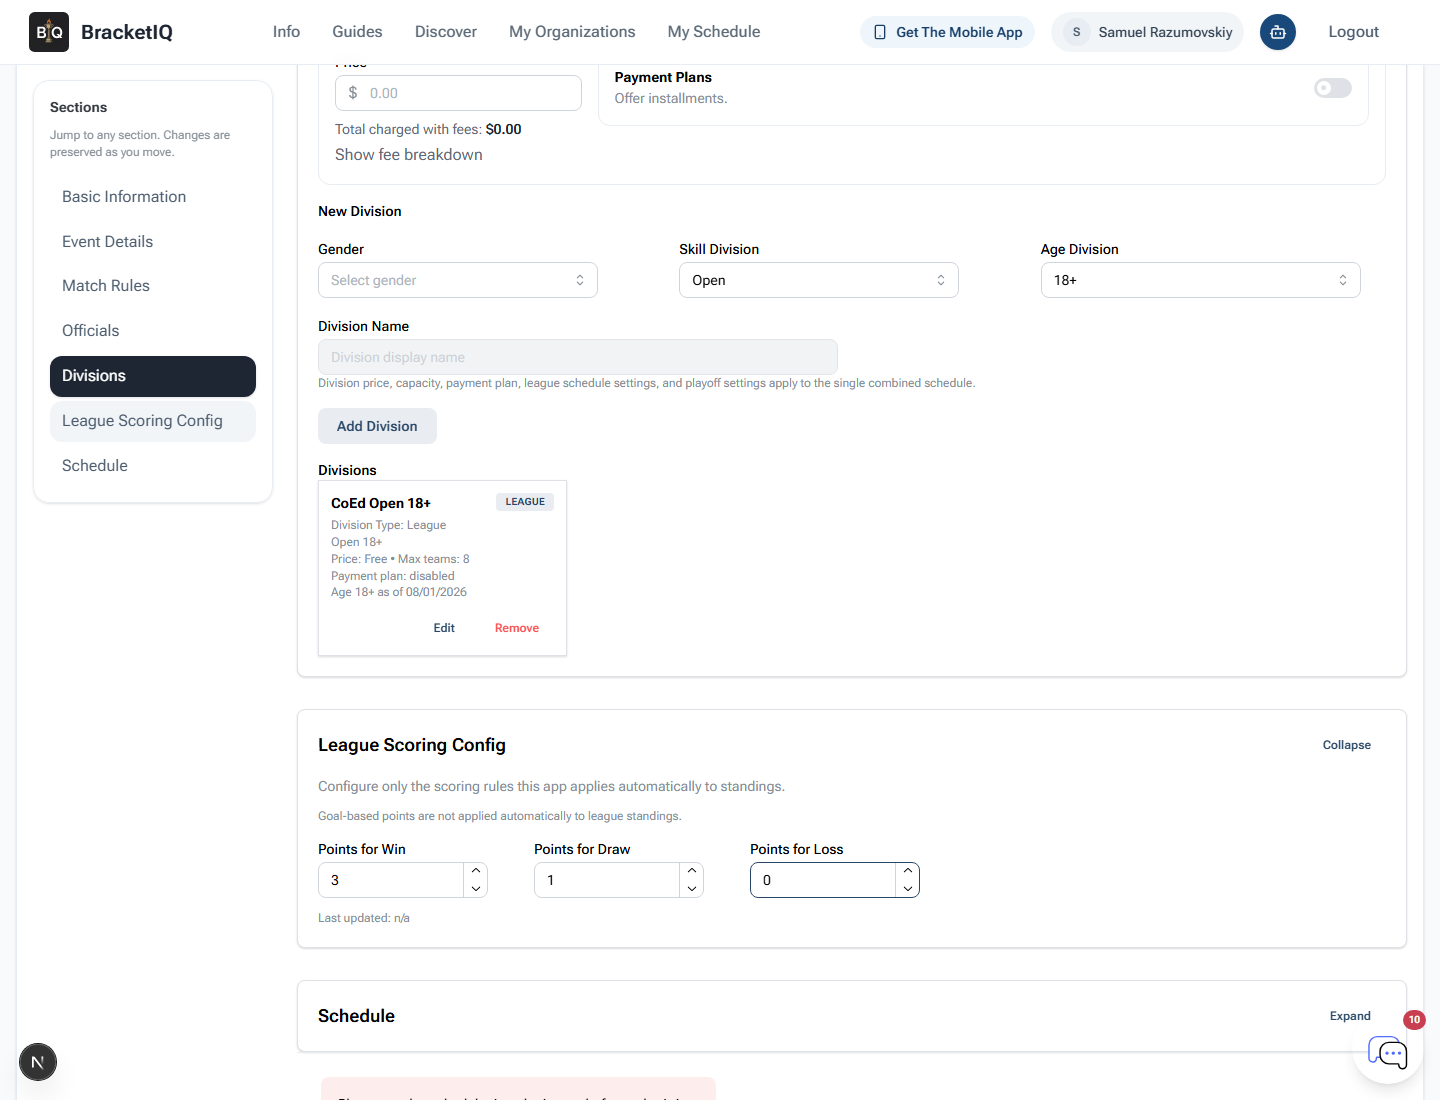
The example uses a common soccer points model:
- Win:
3 - Draw:
1 - Loss:
0
Use the scoring model your teams expect before the season starts. If your league uses a different standings format, set it before match results begin coming in.
Add weekly schedule windows
Open Schedule after the division exists. Select the fields this league can use, choose the day of week, and set the weekly start and end times.
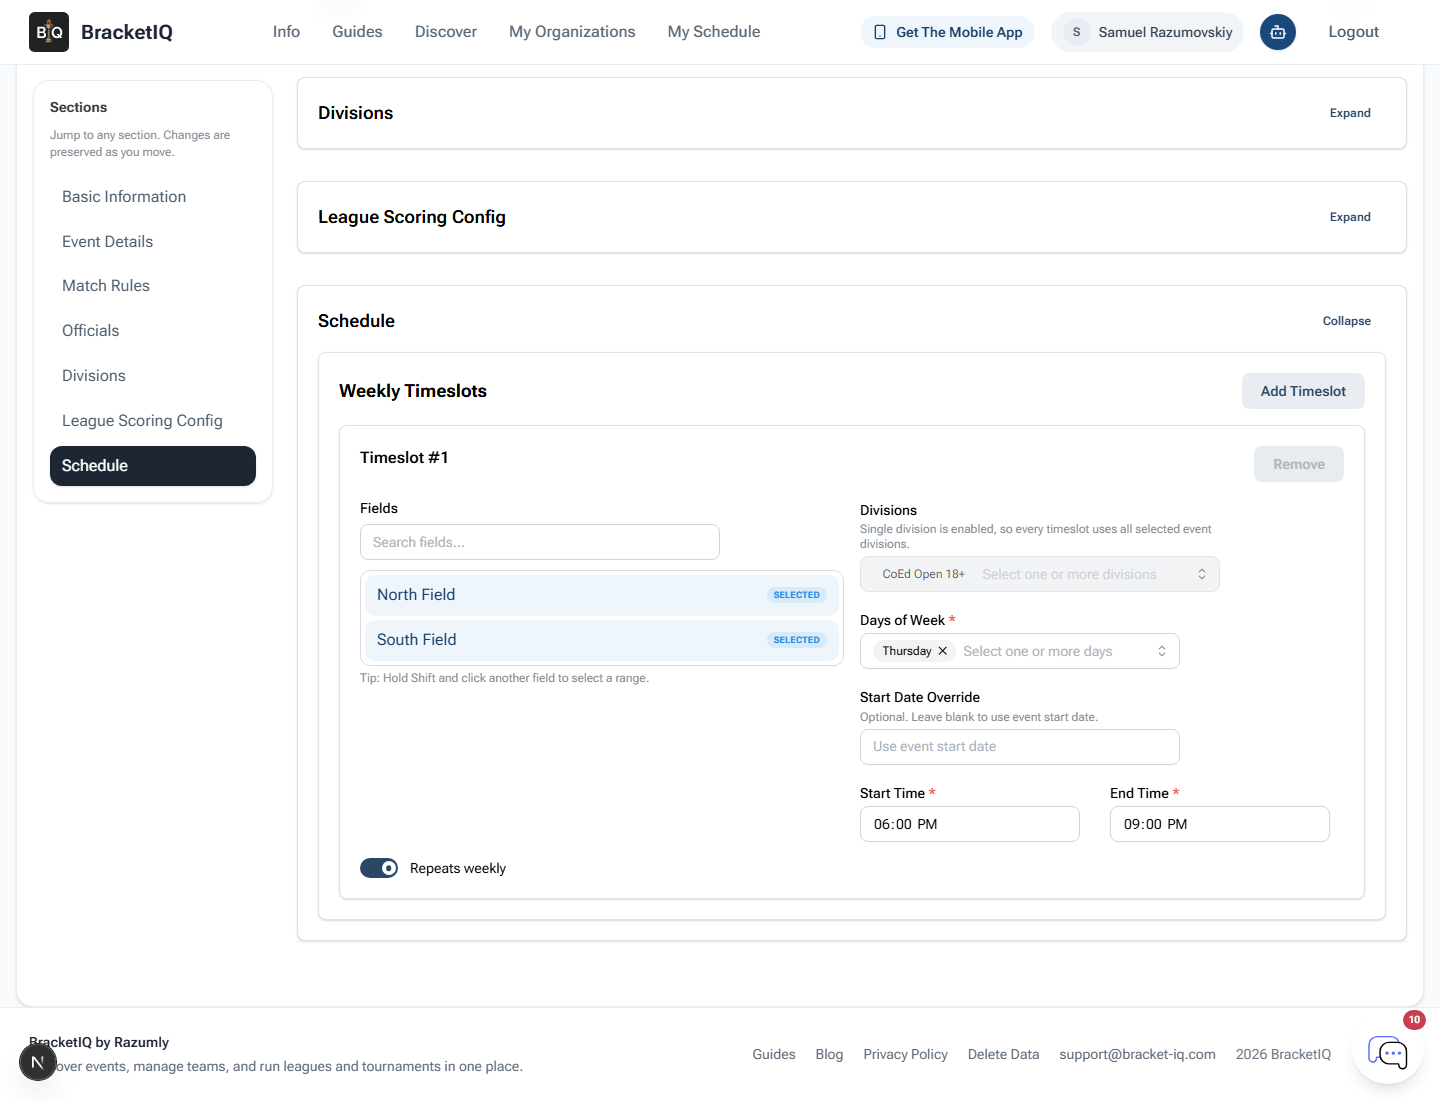
For the example league:
- Fields:
North FieldandSouth Field - Day: Thursday
- Start time:
6:00 PM - End time:
9:00 PM - Repeats weekly: on
Think of this section as the weekly availability BracketIQ can use for league matches. It tells BracketIQ when the league is allowed to schedule games, not just when the public page begins.
Create the league
When the image, league type, team size, location, fields, division, standings points, and weekly schedule window are ready, click Create Event. BracketIQ saves the league and opens the event workspace.
Review the saved league while it is still a draft. Check the name, sport, registration type, dates, location, capacity, division, scoring points, and schedule window before you share the link.
Publish the league
Draft leagues are not ready for public registration. To open the league, change the status from Draft to Published and save.

After saving, confirm the status stays Published and the page shows no unsaved changes.
Check the public league page
Open the participant-facing league page after publishing. This is the page teams use to understand the league and start registration.
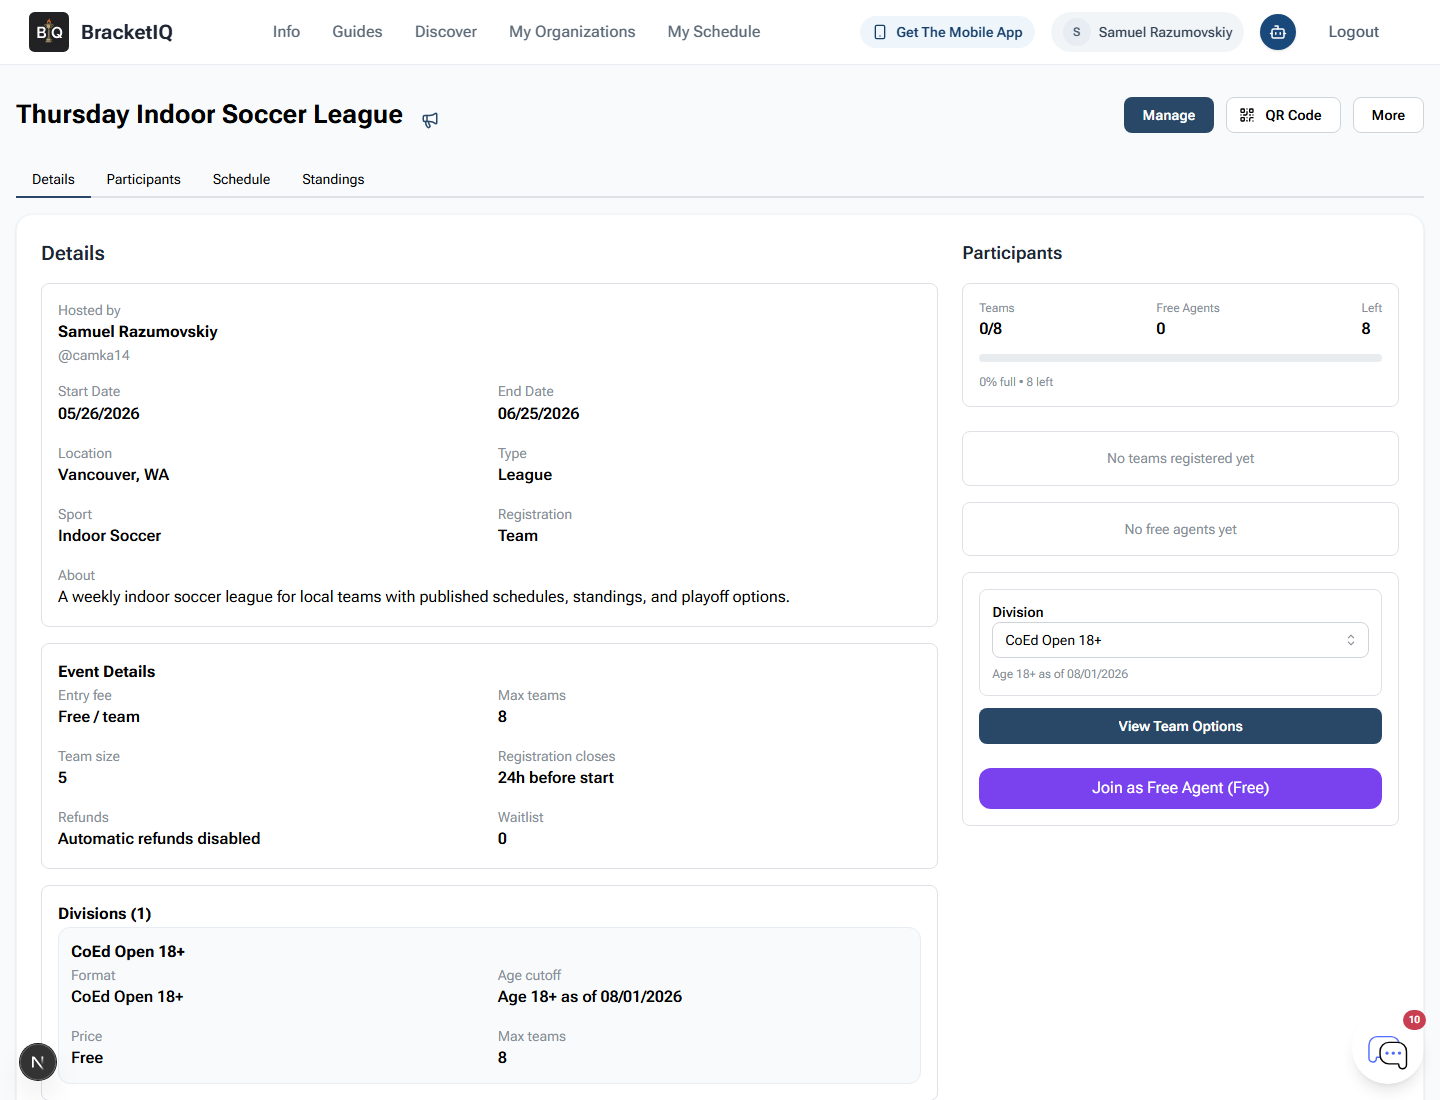
Check the public details:
- League name and image.
- Start date and end date.
- Location and sport.
- Registration type and team size.
- Entry fee.
- Max teams.
- Division details.
- Registration cutoff.
This final check catches the common setup mistakes before captains start creating teams.
League creation checklist
Use this checklist for the next league you create:
- Add a clear image, sport, name, and description.
- Set Event Type to
League. - Confirm team size and registration cutoff.
- Confirm the season dates and location.
- Add the available fields, courts, rinks, or surfaces.
- Add at least one division.
- Set capacity and price before publishing.
- Set league standings points.
- Add weekly schedule windows.
- Create the league, then publish it.
- Open the public page and verify what teams will see.
League registration, team review, schedule changes, weekly results, standings, and playoffs are separate workflows. Create the league first, then keep the event workspace as the source of truth for the rest of the season.
