Start from the facility organization
Open the BracketIQ organization that represents the facility. If the facility has not been created yet, start with How to Create and Set Up an Organization in BracketIQ, then return to this workflow.
The organization dashboard is the facility control room. Use it to move between the public page, fields or courts, events, customers, products, staff, refunds, and payment setup.
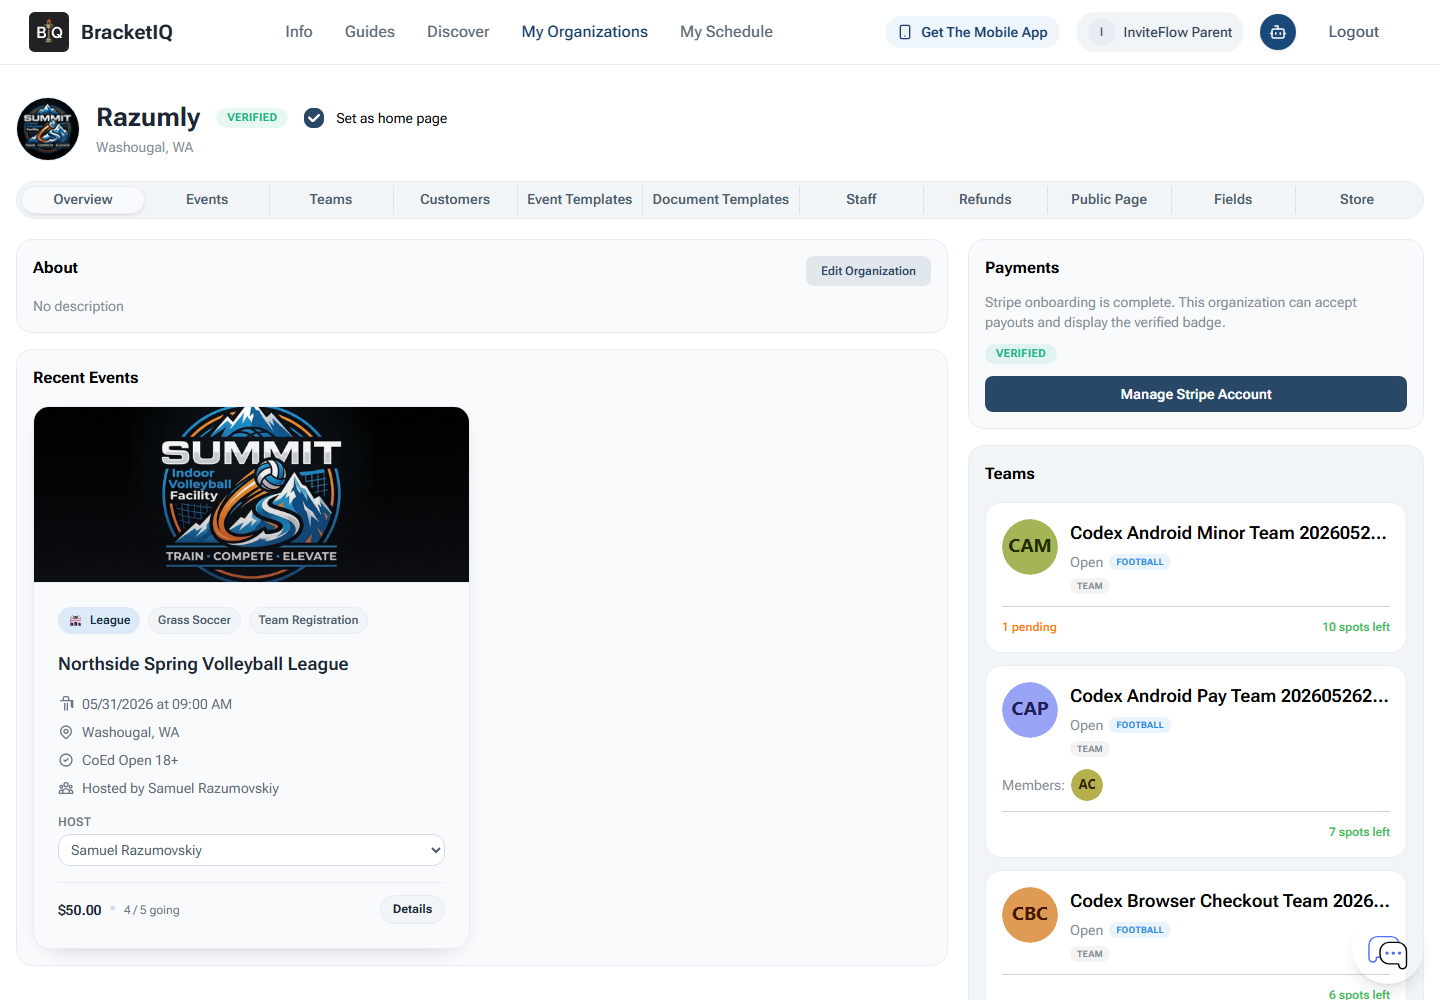
Before adding more operations, confirm the basics:
- The organization name and location match the facility.
- The organization is verified if it will accept payments.
- The tabs match the workflows the facility needs to run.
- Staff know whether they should manage events, fields, rentals, customers, products, refunds, or public-page updates.
A sports facility usually needs a few connected workflows instead of one isolated event. BracketIQ works best when the facility first defines its spaces, then publishes the registrations, rentals, and public pages that depend on those spaces.
Set up fields, courts, and rental availability
Open the Fields tab. This is where facility operators manage the courts, fields, surfaces, and rental windows that determine what can be scheduled or booked.
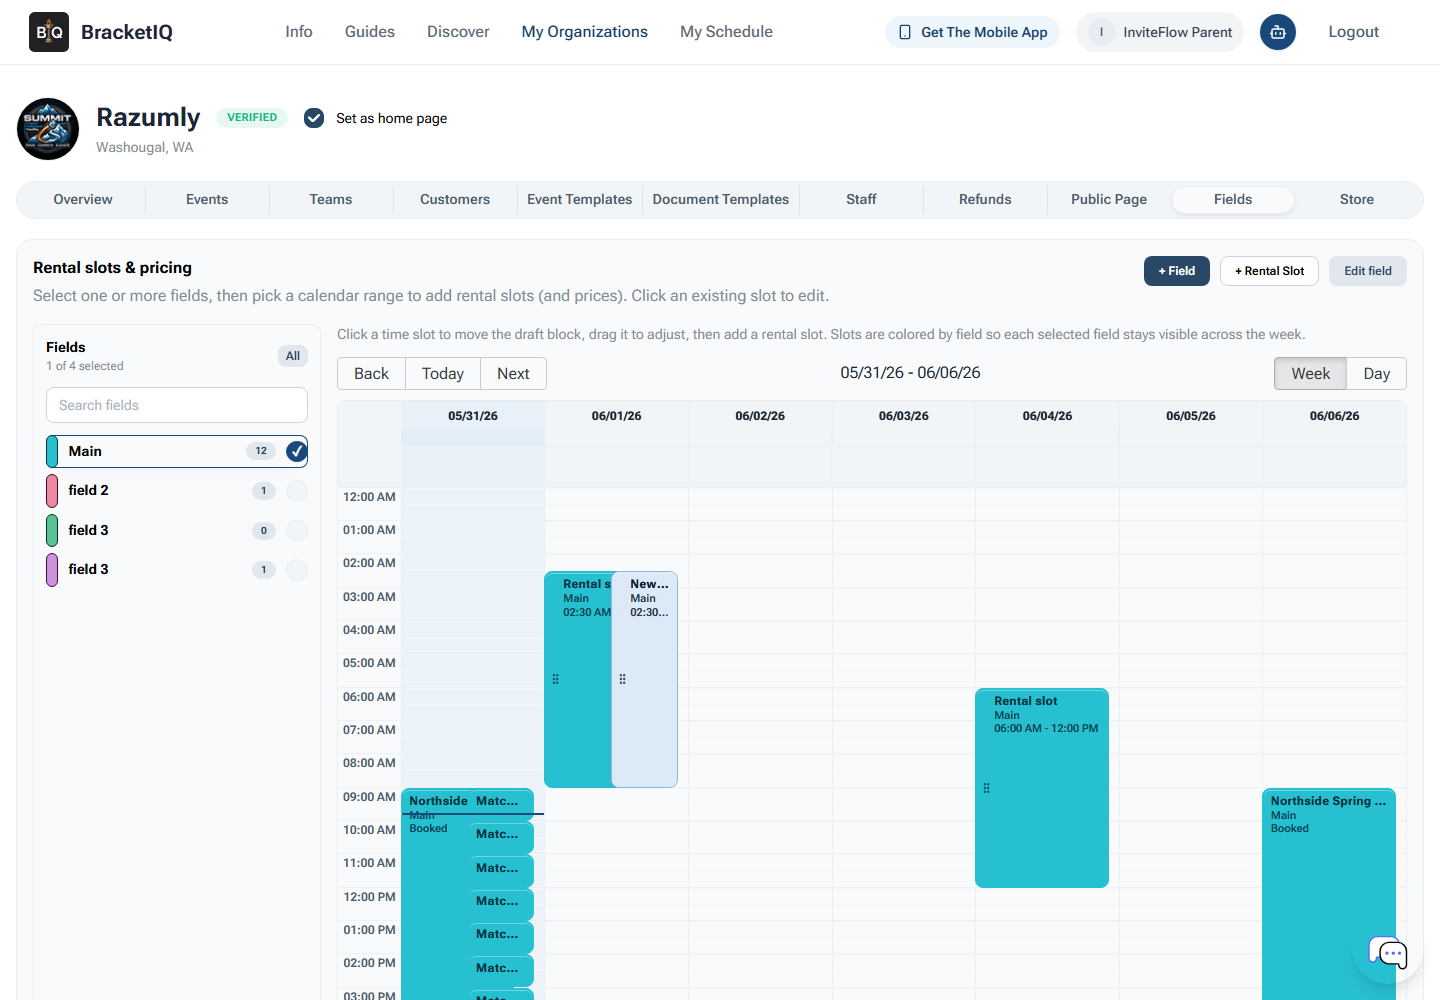
Review each field or court for:
- Name that staff and customers will recognize.
- Location or facility area when the venue has multiple buildings, gyms, turf fields, or outdoor surfaces.
- Sport or division constraints when a surface should only be used for certain activities.
- Rental windows for public booking.
- Price and availability when customers can reserve space.
Do this before creating a full calendar of events. If courts or fields are missing, staff may build schedules around incomplete inventory and then need to fix conflicts later.
For rentals, think like the customer. A public rental slot should make the time, space, price, and booking path obvious. If the facility only accepts rentals for some courts or only at specific times, keep those limits visible in the setup instead of relying on manual follow-up.
Review facility events and registrations
Open the Events tab to review what the facility is hosting. This can include leagues, tournaments, clinics, open play, pickup events, and other scheduled programming.
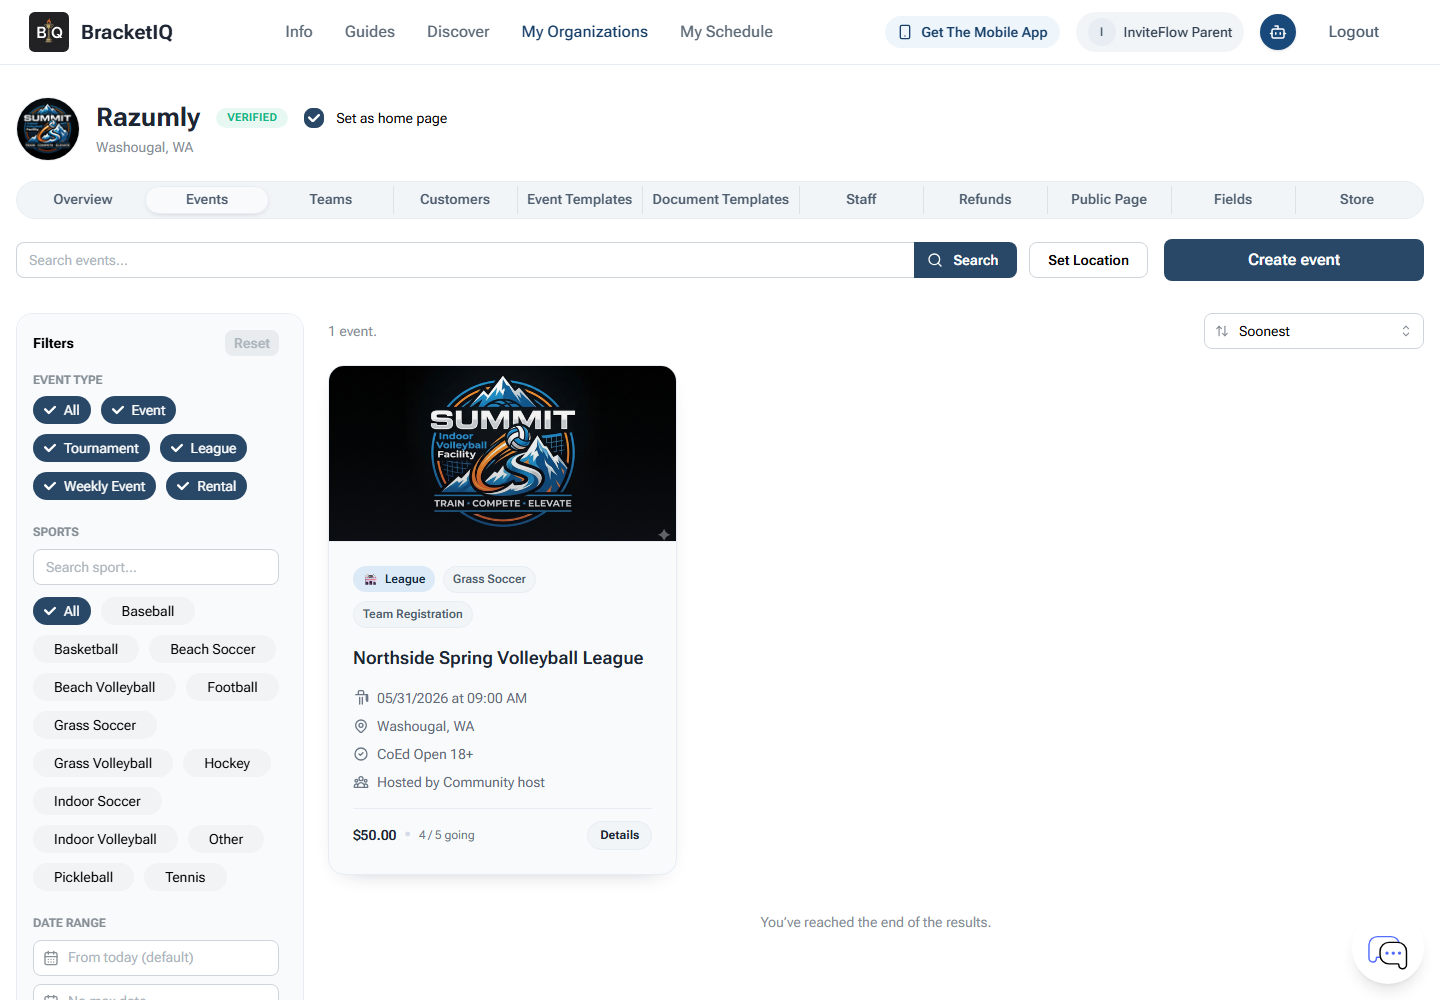
Use the event list to answer operational questions:
- What is published and visible to participants?
- Which events still need registration settings, prices, schedules, or public-page review?
- Which events are tied to the facility organization instead of an individual host?
- Which events need staff support, check-in, score entry, or schedule communication?
For league setup, use How to Create a League in BracketIQ. For tournament setup, use How to Create a Tournament in BracketIQ. For shared registration settings across leagues and tournaments, use How to Set Up Online Registration for a League or Tournament.
The facility view is not only for creating events. It is the place to keep events organized after they exist. Staff should regularly check the list before publishing new sessions so they can avoid double-booking surfaces, overlapping staff needs, or confusing public listings.
Add products and paid facility items
Open the Store tab when the facility sells products, passes, recurring memberships, equipment rentals, or other non-event items.
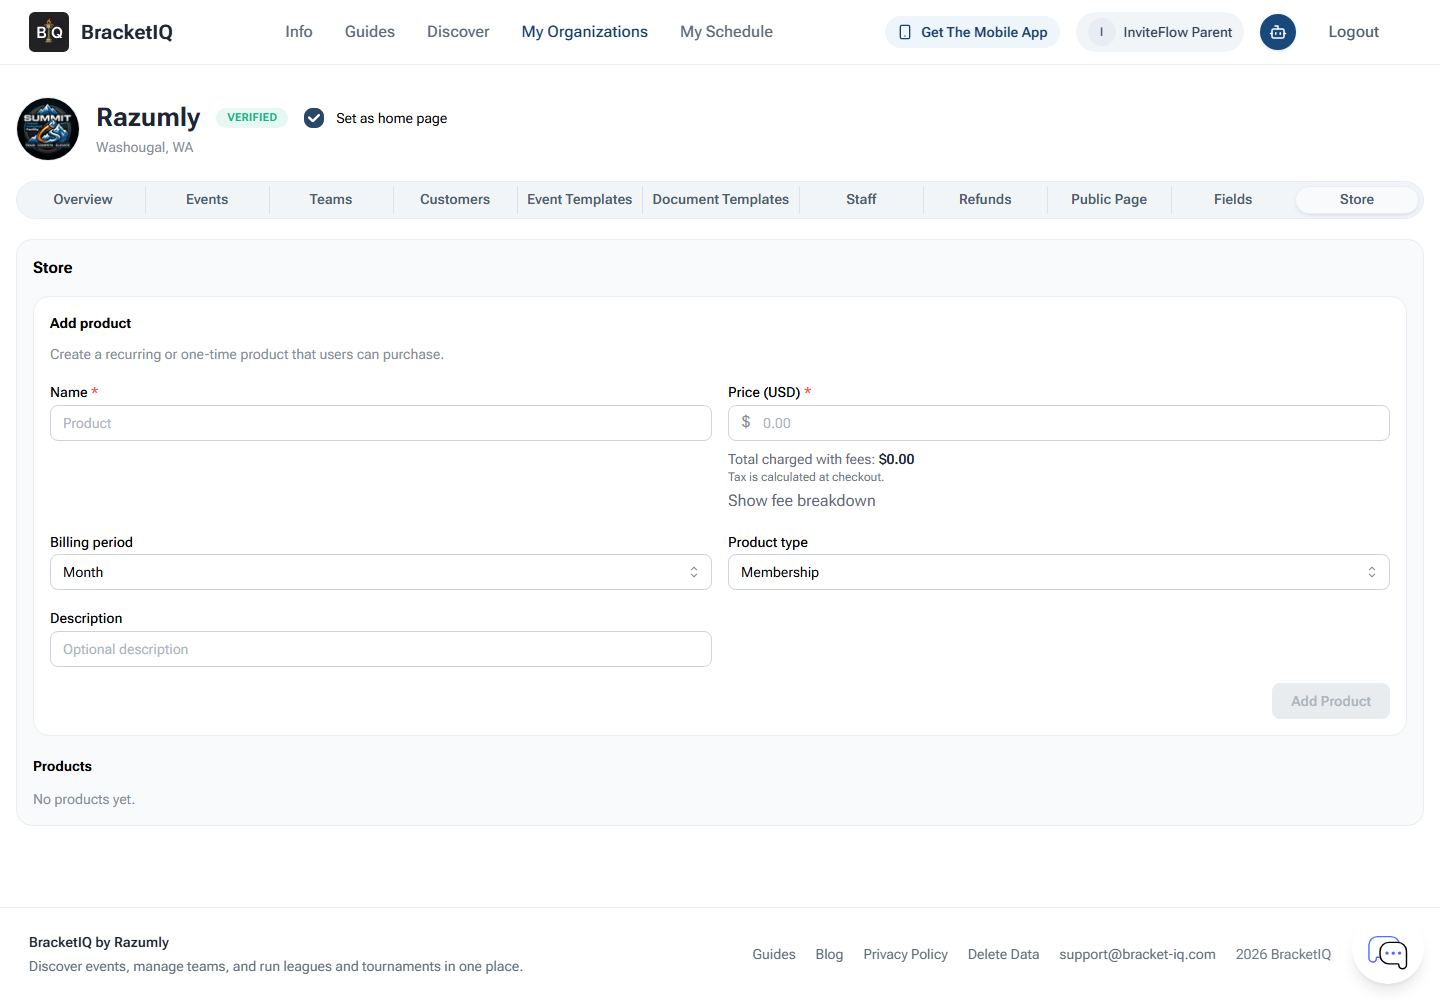
Create products with the same discipline you use for events:
- Name the product clearly.
- Set the price before sharing the public page.
- Choose the billing period.
- Choose the product type.
- Add a short description when customers need context.
- Keep inactive or test products off the public page.
If the facility will collect money through BracketIQ, finish How to Set Up Payment Processing for Your BracketIQ Organization before publishing paid products, paid registrations, or paid rentals.
Payments should not be an afterthought. Check the organization payment status, product price, tax handling, refund process, and public checkout path before customers start purchasing.
Publish the facility public page and widgets
Open the Public Page tab before sending players, parents, teams, renters, or customers to the facility.
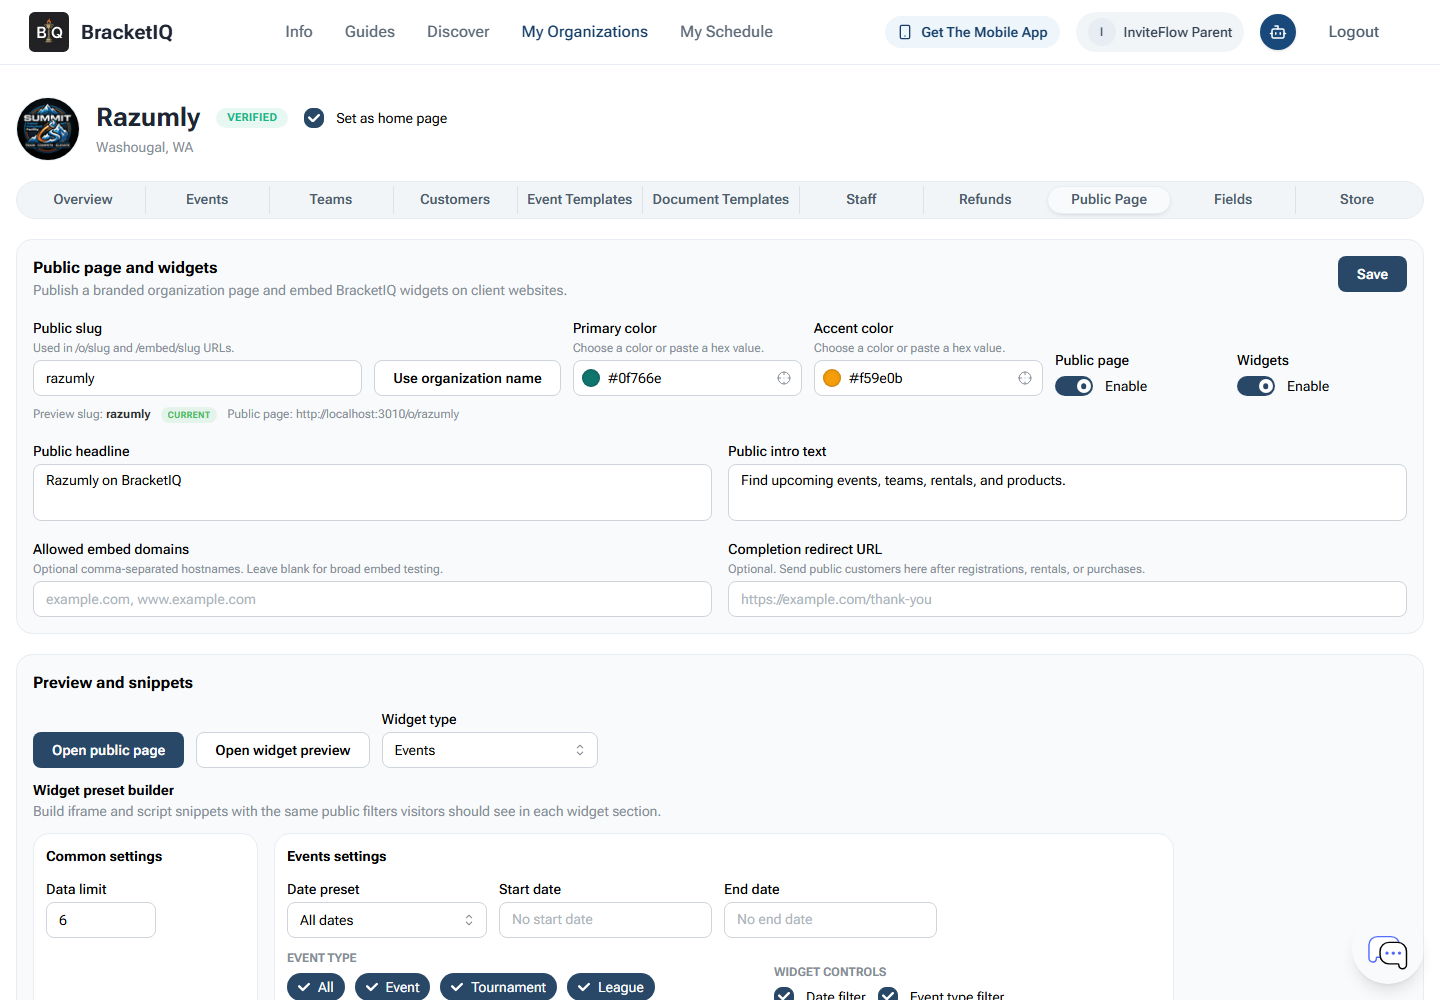
Use this tab to control how the facility appears outside the manager dashboard:
Public slugsets the shareable organization URL.- Brand colors help the page feel connected to the facility.
Public pagemust be enabled before visitors can open it.Widgetslet the facility embed BracketIQ sections on an existing website.- Headline and intro text explain what visitors can do.
- Allowed embed domains can limit where widgets are used.
- Completion redirect URL can return customers to the facility website after registration, rental, or purchase.
Open the public page and widget preview before sharing the links. If the page is empty, add the public workflows first: events, teams, rental slots, products, or registration links.
For a deeper walkthrough of this tab, use How to Create a Public Page for Your Sports Organization.
Give staff the right workflow
Facility management usually involves more than one person. After the main surfaces and public workflows are in place, open the Staff tab and review who can help manage the organization.
Keep access practical:
- Front desk staff may need customers, rentals, and check-in workflows.
- League coordinators may need events, teams, schedules, standings, and communication.
- Tournament directors may need registration, schedules, results, and refunds.
- Finance or ownership may need payment processing, products, refunds, and reporting.
Avoid giving every staff member every permission by default. Facility work is easier to audit when each person has access to the workflows they actually manage.
Facility management checklist
Use this checklist when preparing a facility workspace in BracketIQ:
- Create the organization and confirm the facility profile.
- Set up payment processing if the facility will charge online.
- Add fields, courts, or surfaces before building a busy schedule.
- Configure rental windows and prices when public booking is available.
- Create leagues, tournaments, pickup events, clinics, or open play under the organization.
- Review registration settings and participant-facing pages before sharing links.
- Add store products or passes when the facility sells non-event items.
- Enable the public page and widgets when the facility is ready to promote listings.
- Invite staff and assign permissions based on real responsibilities.
- Check the public experience as a customer before the first announcement.
Once those pieces are connected, the facility is no longer relying on separate spreadsheets, payment links, calendars, and text threads. BracketIQ becomes the shared operating layer for spaces, events, customers, payments, and staff.
