Start from the organization dashboard
Open the BracketIQ organization that will collect money for registrations, rentals, products, or other paid workflows. If the organization has not been created yet, start with How to Create and Set Up an Organization in BracketIQ.
On the Overview tab, find the Payments card. This is where BracketIQ shows the current verification status and the action to connect, reopen, or manage Stripe onboarding.
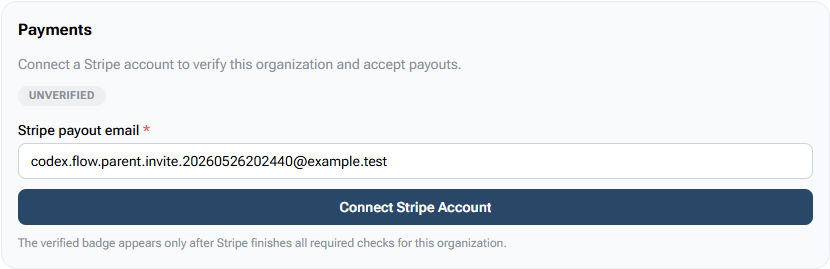
If onboarding is not complete yet, confirm these details before clicking through to Stripe:
- The organization name is the one that should receive the money.
- The person starting onboarding is allowed to manage organization payments.
- The
Stripe payout emailis the email the organization wants associated with payout setup. - The organization is ready to provide business, representative, tax, and bank details during onboarding.
Payment processing is organization-level setup. Once complete, the same organization can use payments across paid event registration, team registration, rentals, and products instead of repeating setup in each workflow.
Start Stripe onboarding from BracketIQ
Click Connect Stripe Account from the Payments card. BracketIQ sends you to a Stripe-hosted onboarding flow for the organization.
Do not share the onboarding link through email, text, or another channel. Stripe account links are intended to be opened from the platform flow that generated them, and they can expire or become invalid after use.
Stripe-hosted onboarding is the part of the workflow where Stripe collects and verifies payment-processing information. The exact screens can vary by country, business type, requested payment capabilities, and verification requirements, so this guide does not recreate the Stripe screens. Use Stripe's official hosted onboarding documentation and identity verification documentation when the organization needs more detail about what Stripe may ask for.
In general, the organization should be prepared to enter or confirm:
- Legal business name and business type.
- Business address and support details.
- Representative or owner information when required.
- Bank account or payout destination.
- Tax or identity verification details when Stripe requests them.
- Stripe service agreement acceptance.
If Stripe asks for information you do not have, stop and collect the correct details from the organization owner or finance contact before continuing.
Return to BracketIQ and check status
After Stripe sends you back to BracketIQ, return to the organization Overview tab and check the Payments card again.
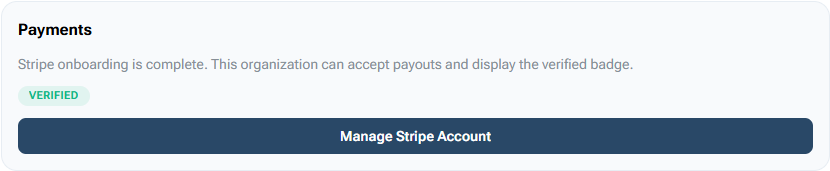
When onboarding is complete, BracketIQ shows that Stripe onboarding is complete, marks the organization as verified, and changes the action to Manage Stripe Account. Use that button when the organization needs to update Stripe-hosted account details, review payout setup, or resolve future verification requests.
If the organization still shows Unverified, do not publish paid workflows yet. Stripe may still need more information, the onboarding session may have been abandoned, or the review may still be pending. Reopen the onboarding flow from BracketIQ and finish any remaining Stripe requirements.
Check paid workflow readiness
After the payment account is connected, review the workflows that will actually collect money. For organizations, that usually means paid team registration, facility rentals, store products, and event payments.
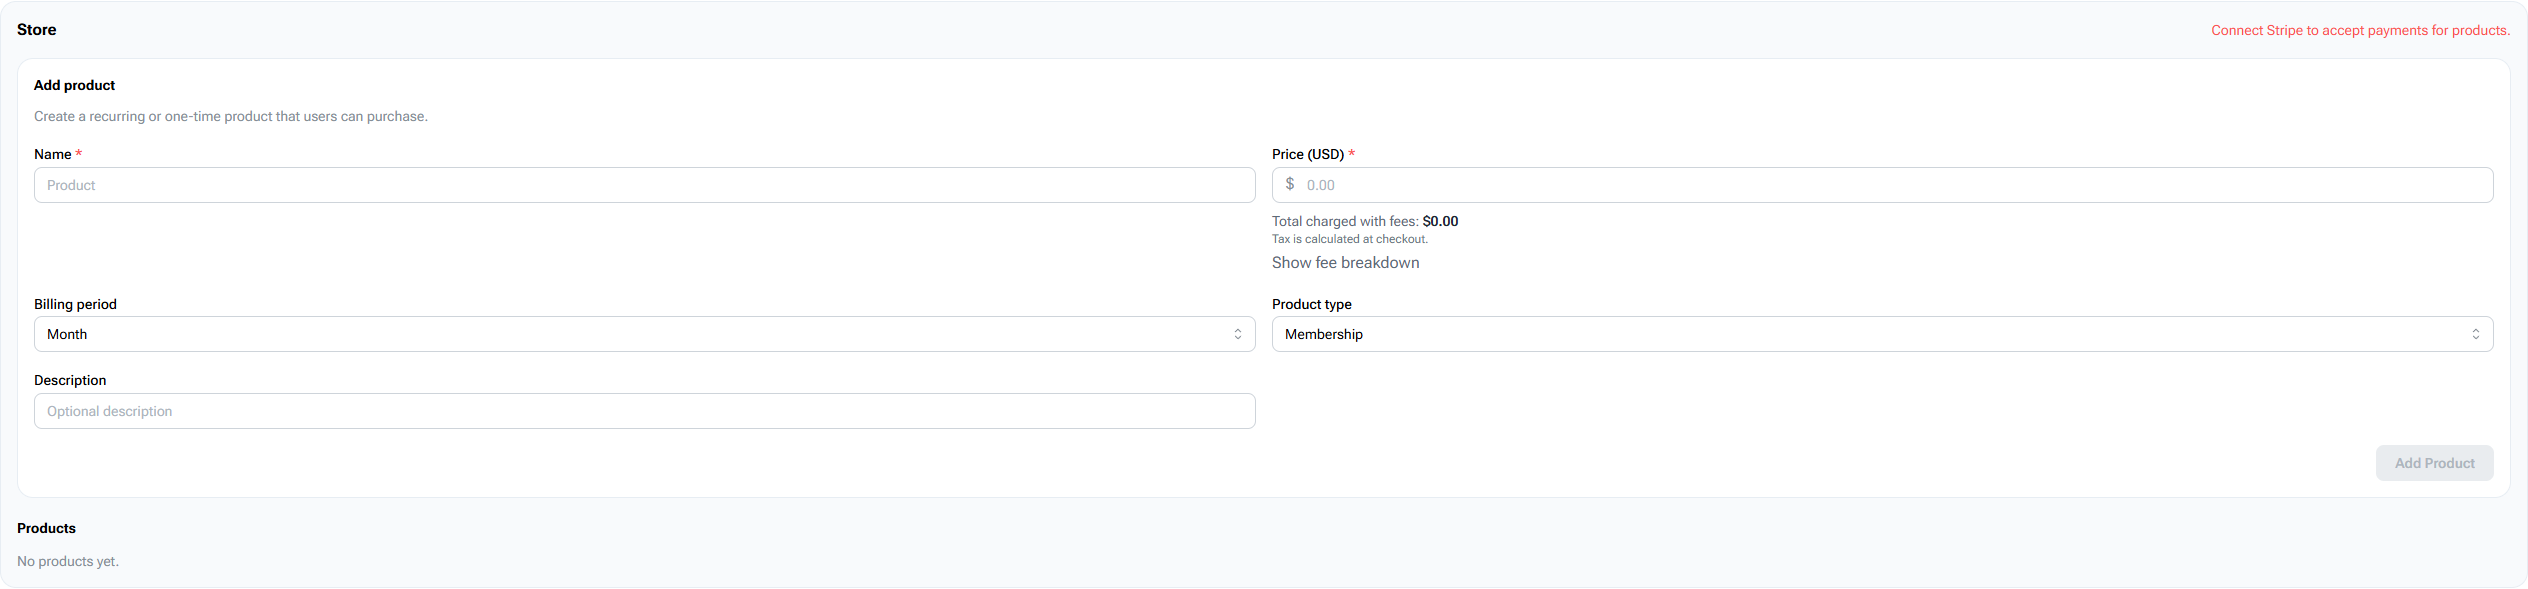
The Store tab is one BracketIQ-controlled place to check whether the organization is ready to accept product payments. Before Stripe is connected, BracketIQ shows the payment dependency directly in the store setup area.
Use the same mindset for every paid workflow:
- For events, leagues, and tournaments, confirm the price, registration capacity, cutoff, refund expectations, and public registration page before sharing the link.
- For rentals, confirm field or court availability, rental price, tax handling, and public booking visibility.
- For products, confirm product name, price, billing period, product type, description, and whether the product should be active.
- For all paid workflows, test the public path before sending it to players, parents, teams, or customers.
If you are setting up paid league or tournament registration next, use How to Set Up Online Registration for a League or Tournament. If you are starting with a smaller paid event, review How to Create a Paid Pickup Sports Event With BracketIQ.
Troubleshoot common payment setup issues
If Connect Stripe Account opens onboarding again, finish the Stripe-hosted steps and return to BracketIQ. Onboarding links can expire, so start from the BracketIQ organization dashboard when you need a fresh link.
If the organization is still unverified after onboarding, check whether Stripe requested additional information. Verification requirements can change over time, and Stripe may ask for more details before charges, payouts, or both are fully enabled.
If staff members cannot start onboarding, check their organization permissions. Payment setup should be handled by the owner or staff who are trusted to manage financial information.
If a paid registration, rental, or product does not allow checkout, confirm both the organization payment status and the workflow-specific price settings. A verified organization still needs each paid item to have its own price, capacity, availability, and public visibility configured correctly.
Payment processing setup checklist
Use this checklist before publishing paid organization workflows:
- Create the BracketIQ organization.
- Open the organization
Overviewtab. - Find the
Paymentscard. - Confirm the payout email.
- Click
Connect Stripe Account. - Complete Stripe-hosted onboarding from the BracketIQ redirect.
- Return to BracketIQ and check the verification status.
- Confirm that
Manage Stripe Accountappears after onboarding is complete. - Review the paid workflow you plan to publish.
- Test the public registration, rental, or purchase path before sharing it.
Once payment processing is ready, the organization can treat BracketIQ as the shared workspace for registrations, rentals, products, customer payments, refunds, and payment follow-up.
